Tips & DIY installation instructions
Wondering about installing yourself a parquet, laminate, or vinyl flooring? We would like to provide you with some laying instructions and tips on how to install your Floer. In several helpful videos, we demonstrate how to lay a floor. Proper installation of the floor is crucial for maintaining the manufacturer’s warranty. Did you know that Floer parquet installers are available to visit you and professionally install your floor? If you are interested in the Floer installation service, ask your nearest dealer about the possibilities. This way, you can avoid the 5 most common mistakes when laying a floor.
Step 1: Calculate materials
Before installing a new floor, measure the room in advance and calculate the required square footage. Keep in mind that when laying planks diagonally, there will be an additional 7% cutting loss. For a herringbone pattern, the cutting loss will be 12%. It’s important to choose the right type of floor and consider the differences between them. If you plan to install Dryback Vinyl floors, we recommend having a specialist level the floor beforehand. When installing an Oak Herringbone Parquet floor, it’s best to hire a specialist.
Step 2: 48-hour acclimatisation
Have you made your flooring choice? Be sure to have the planks in the room for at least 48 hours before installation. Failure to do so may result in the planks shrinking or expanding after installation due to changes in temperature or humidity. By allowing the planks to acclimate in the room where the floor will be installed, any effects after installation will be minimal. Want more information? Check out this article to learn why it’s important for a floor to acclimate.
Step 3: Preparing underlay
Before laying the wood, or laminate flooring, it is necessary to prepare the underlay. First, ensure that the subfloor is clean, but do not clean it with water shortly before laying. This is because the floor should be as dry as possible, with a maximum humidity of 2%. For anhydrite, the maximum humidity should be 0.5%. If the humidity is higher, it can soak into the wood, causing the parquet to warp immediately after laying. Over time, the wood/MDF may even rot. Fill any pits with levelling cement and ensure that the subfloor is level enough. Small irregularities up to 2 mm can be compensated for with the subfloor. You can find a range of underlays on the Accessories page.
Remove skirting boards where necessary, and start laying a subfloor with a vapour barrier. This vapour-proof foil ensures that moisture cannot reach the parquet from the subfloor. If you live in an upstairs flat or apartment, take noise reduction requirements into account. In most cases, you will need a sound-reducing underlay here. You can ask your VVE/Housing Association whether noise reduction is required in your case.
Step 4: Laying tracks
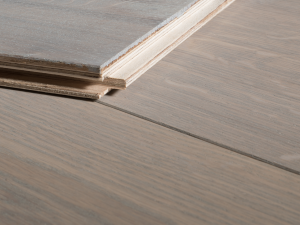
Once you have completed the previous steps, you can begin laying the laminate or parquet. Start by carefully reading the complete laying instructions. Lay the first floorboard with the groove facing the wall. Use cork spacers to ensure that it is 1 cm away from the wall. Next, lay the next plank on the short side of the first plank along the wall. Use a tapping block to tap this board into the joint of the previous board. This will prevent the board from being hit and damaging the wood or laminate.
Begin by laying the first course of the floor. Once it’s in place, lay the next course across its long side. Be sure to stagger the seams and never place them closer than 40 cm apart in the next course. This will create a “half-length” bond. As you lay the floor, use a striking bar to tap the strips into place.
If you encounter pipes during installation, such as CV pipes, cut out curved sections in the plank. Allow an additional 10mm for possible floor movement. Then, saw transversely from the long side to the curves and lay the board around the pipes. After laying, you can glue the loose parts back to the board.
Step 5: Sealing the floor
Repeat laying the floorboards until you reach the other side of the room. Measure how many more boards you need. In general, the boards should be cut to the appropriate width. When sealing the floor on this side, leave a 1 cm gap from the wall. Additionally, walls are often not completely straight, so the wooden floorboards may need to be sawn at an angle to fit properly.
Step 6: Finishing off
Have you completed the last step? If so, the floor is now ready for use! However, the oak parquet still needs to be treated with maintenance oil. You may also want to finish the floor with skirting boards. When selecting skirting boards, choose a colour that matches the walls, often white, rather than the floor. It’s important to note that a skirting board is a part of the wall and not the floor. For high walls, choose a high skirting board.
 Extra tips & laying instructions
 Extra tips & laying instructions
- When installing an oak floor, it is important to maintain a room humidity level between 40% and 60%. Failure to do so may result in loss of warranty.
- With our oak floors, the parquet needs to be oiled after installation.
- For a solid wooden floor, we recommend using tension springs. These springs are placed under the skirting boards and can absorb any movement of the floor. Next, lay the skirting boards and attach them to the wall using glue or nails.
- Has the floor become higher and the doors no longer open properly? If so, saw off part of the bottom of the door so that it is 5 cm off the wooden floor.
- If you plan to lay the floor at a later date, leave the package or packages containing the floorboards sealed if possible. Do not store the floorboards in damp rooms, in the sun, garage, or outside. Make sure the floorboards are kept in a room with the right temperature (around 18 to 21 degrees) and humidity (between 40% and 60%). Always follow the floor’s laying instructions.
Are you interested in vinyl flooring? Check out our selection of Rigid Click Vinyl, Tile Rigid Click Vinyl, Wide Vinyl, and Whalebone Vinyl. If you need more information or are having trouble understanding the laying instructions, our flooring videos can help. We have videos on how to lay a Herringbone Laminate floor, which is especially useful when laying a Herringbone Oak floor. Additionally, we offer step-by-step plans and blogs to support these FloerTube videos. If you need further assistance, don’t hesitate to contact us!