![]()
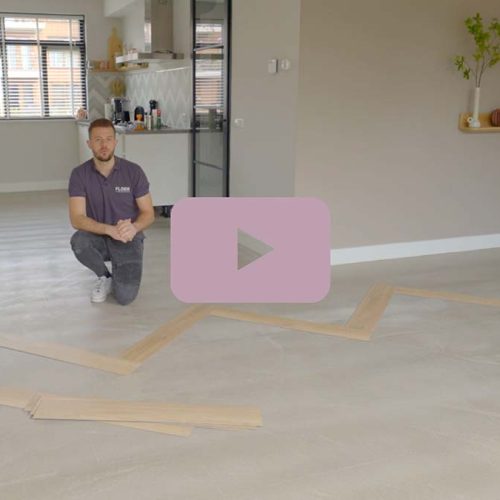
If you’re considering laying an XL laminate floor and wondering about the process for installing extra wide laminate, you’ve come to the right place! While some might think laying a floor is a complicated job, it’s actually quite straightforward. Whether you need a refresher course or are curious about laying a wide laminate floor with the Variclick joint, we’re here to help. Keep reading and check out our helpful laying video below!
Wide laminate acclimatisation
Before laying the floor, the XL laminate planks should be acclimatised in the room where they will be installed. This allows the floor to adjust to the indoor environment of the home. Failure to acclimate or insufficient acclimatisation can cause the floor to “work”. In this case, “working” means that the product reacts to humidity or temperature differences in the house. Proper acclimatisation is necessary and applies to all types of floors, including vinyl floors. Has your floor been in the same room for at least 48 hours? Great! Then your beautiful new floor is now acclimated to the indoor climate of your home and ready to be installed.
Requirements when installing extra-wide laminate
We recommend preparing everything you need before laying the Floer Country House Laminate. Good preparation is half the battle! Here’s a quick overview of what you need to install 32 cm extra wide laminate.
- Broom
- Putty knife
- Steel square
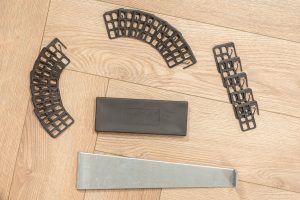
- Floer installation kit
- Pencil
- Rubber mallet
- Stanley knife
- Calculator (or fast calculating super brain)
- Measuring plank
Is everything ready? Check! Now you’re ready to move on to the next step!
Check the subfloor
Before installing the floor, it’s important to inspect the subfloor to ensure it’s even. There’s no need to hire a team of experts for this task; fortunately, it’s something you can do yourself! If you notice any dried paint drops or small holes in the substrate, you can easily remove them with a putty knife. For larger irregularities, levelling may be necessary. However, small unevenness such as dents can often be corrected with a good subfloor. If you’re unsure about the subfloor, consult with your nearest Floer dealer for guidance. Also, make sure to sweep and vacuum the subfloor to remove any dust or dirt particles after correcting any unevenness. This ensures that even the smallest dust particles won’t interfere with the installation process.
Laying underlay
Before laying extra wide laminate, you must first install the underlay. Roll the underlay out and connect the strips using the adhesive strip provided. If your subfloor does not have an adhesive strip, use Floer Alutape underlay tape to keep the rolls connected and prevent them from shifting during laying. Using Floer Silent Underlay, a 10 dB TÜV certified underlay, in the installation video above, ensures that the Silent Underlay has text to indicate which side of the floor should be up. Always make sure there is a raised edge along the wall when using this underlay.
Starting points of an extra-wide laminate
Both the Country House Laminate and City Laminate floors feature the Variclick joint and can be laid in two different ways. However, note that regardless of the laying method you choose, the first two strips are always laid in the same way as laying method 1. The difference between the two laying methods is that in laying method 1, you join the long sides together, while in laying method 2, you start by joining the end of the floorboard. We will start by explaining laying method 1, which is used for the first two lanes anyway.
 Laying method 1

Start by laying the first laminate plank. Then, use a sawn plank that is at least 40 cm long to fasten it to the long side of the first plank. Slide this plank towards the wall and click the third laminate plank onto the long side of the first-floor plank. You click the floorboards into place by moving the floorboard from top to bottom. The golden rule for laying method 1 is to always lay the long side first. Thanks to the spacers, you can ensure the correct distance between the wall and floorboards, which should be at least 1 cm.
Next, slide the third board toward the end of the second board. Using a tapping block and an impact iron, click both end boards together. With a little force, you can easily and quickly tap the 32 cm laminate plank into place. Repeat this process until you have laid two strips.
If you have arrived at the opposite side of the starting spot, the tapping block may not fit between the wall and the plank. In this case, use the striking bar instead. This will make the floor click into the joint and the XXL laminate floor will lie stable. Watch the installation video for the best way to do this!
Floer tip
Wondering how to cut a plank to size? Start by placing a new laminate plank, bottom side up, on the spot where you want it to be. Mark the required piece and cut the plank to size. Finally, install the custom-made piece. To position it perfectly, use a striking bar, as shown in the video starting from minute 2:45!
After the first two lanes
Are the first two strips lying flat? Place spacers between the floor and the wall to maintain a consistent 1 cm gap. Then continue laying the third and fourth strips using the same method as the first two. Ensure that the end joints are at least 40 cm apart, as demonstrated in the video at 4:10. Afterward, unroll a new strip of underlay and secure it using the adhesive aluminum strip. If you are satisfied with this approach, proceed to install the extra wide laminate using laying method 1.
Laying method 2
Do you want to install the 32 cm extra wide laminate with the Variclick joint even faster? You can! Laying method 2 is a little quicker than laying method 1. First, use laying method 1 to lay the first two strips. After that, you can speed up with laying method 2.
How does this method work? After the first two strips, attach the first plank to the wall using laying method 2. Then, lay a pack of laminate on top of it to weigh it down a little. Sit on the laminate you have already laid. Using laying method 2, first, attach the short side of the plank and then pull the plank towards you (towards the 2 laminate strips you have already installed). This method works much faster! You can continue laying the Floer easily and quickly in this way. Every time you lay another plank using laying method 2, slide the laminate pack onto the last installed plank to weigh it down a little. Keep going until you are finished!
As a final step, cut the subfloor to size, leaving a small raised edge. Remove the spacers, and neatly finish the distance between the wall and the floor with a nice matching skirting board or MDF wall skirting!
Brief conclusion
Here is a list of steps to follow when laying a laminate floor:
- Allow the laminate pack to acclimatize in the room where the floor will be laid.
- Gather all the necessary supplies for laying the floor.
- Check the subfloor and lay the underlay.
- Ensure the surface is free of dust and dirt before laying the subfloor.
- Begin laying the laminate floor, keeping the different installation methods in mind.
- Once the floor has been laid, cut off the subfloor and leave a small raised edge.
- Finish the job neatly with a luxury MDF skirting board or an adhesive skirting board in the same colour as the floor.
Take a look at the rest of the range
The floors in the City Laminate collection have a width of 24.4 cm, making them extra wide. If you’re looking for something different from wide V-grooved laminate, check out the unique oak Herringbone Laminate floors. In addition to an extensive range of laminate floors, Floer also offers a diverse selection of vinyl floors, including Rigid Click Vinyl and Dryback Vinyl floors. This type of flooring is available in three different collections: Nature Rigid Click Vinyl, tough Tile Rigid Click Vinyl, and the popular Herringbone Rigid Click Vinyl flooring. However, installing Rigid Click Vinyl floors is not as easy as other types of flooring, so we only recommend it for experienced DIYers who have lots of guidance. These floors are also available in a wide variant, known as wide vinyl. If you want a unique herringbone vinyl floor, check out the Whalebone Vinyl or its little brother, the Herringbone Vinyl.