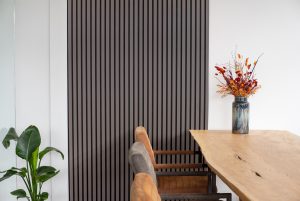
In this new episode of FloerTube, we demonstrate how to install a Floer Akupanel XL Wall Panel to a wall. Assembling the acoustic wall panels can be done in different ways and is very easy. We show you the two most common installation options in this DIY video so that you can quickly and easily brighten up that bare wall with one of the Floer Akupanel XL Wall Panels! Press play and find out for yourself in this handy DIY installation guide.
Installation options of Akupanels
Wooden wall panels can be installed in a home in different ways. The most common mounting options for installing wooden wall panels are with screws or with sealant. In this handy DIY video, we demonstrate both options! If you want to maximise the acoustic benefits of your wall panels, you should install a frame on the wall and add insulating material. This can significantly reduce the number of decibels in the room! While this installation option is most commonly seen in sound studios and similar spaces, in homes, offices, and other spaces, we mainly see the first two installation options, which is why we focus on them in the video.
Did you know that a Floer can also help reduce noise? With the right underlay, such as the Floer Silent Underlay, extra wide laminate, and other laminate floorings can sound much quieter to downstairs neighbours. That’s why the combination of a Floer and an Akupanel is perfect for noisy homes!
Are you curious about the floors in the video?
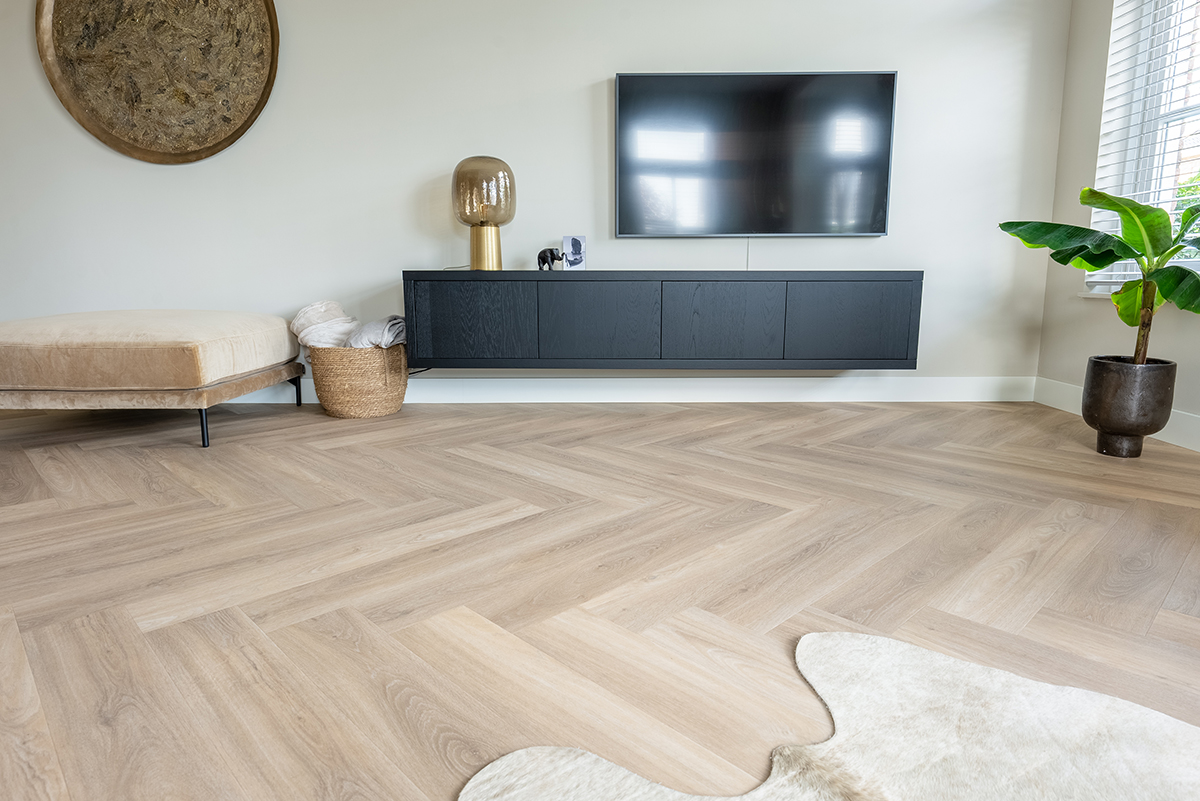
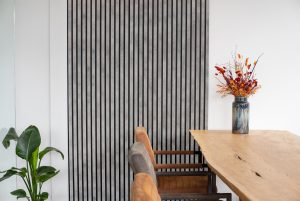
The first part of this DIY video showcases a custom-made oak herringbone parquet floor. This wooden herringbone floor is untreated, oiled, and finished without a V-groove around the plank. In the second part, you’ll see one of Floer’s top floors – a popular Whalebone Vinyl floor in the color Orka Untreated.
What do you need to install Akupanel?
If you’re planning to install an Akupanel yourself and want to know what you need for the job, it depends on your chosen method of installation. If you’ll be using screws, you’ll need the following materials:
1. Floer Akupanel XL wall panel
2. Saw
3. Impact drill (if it’s a concrete wall)
4. Power drill
5. (black) Screws
6. Dowels
7. Measuring tool
8. Spirit level
9. Pencil
10. Sandpaper
11. Stanley knife
12. Vacuum cleaner
13. Dry clean cloth
If you are planning to install the wall panels with sealant, then you will need slightly less material:
1. Floer Akupanel XL wall panel
2. Saw / cutting machine
3. Floer High Tack Kit
4. Measuring tool
5. Spirit level
6. Pencil
7. Sandpaper
8. Stanley knife
9. Dry clean cloth
1. Installing Akupanel with screws
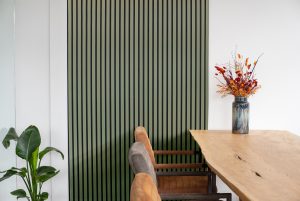
Let’s continue with the story by installing Akupanel wall panels using screws! The first step is to measure the wall where the Akupanels will be installed. The Akupanel XL wall panels have a length of 300 cm, making them extra long. This allows the panels to fit any home, whether it has a newly built house or an extra-high ceiling. The 3-meter Akupanel wall panels can be installed in the room, either floating or from floor to ceiling. Floating installation means that the panel is not connected to the ceiling or floor. Most people prefer full coverage and installing the wall panels from the ground to the ceiling, which is a big plus for these long wall panels!
Did you know that Floer Akupanels are not the only extra-long products in the range?
The extra wide vinyl floors from the Country House Vinyl collection measure 154 cm in length, which can also be considered extra long. For those who prefer even longer floors, take a look at the Authentic Laminate, which offers floorboards measuring an impressive 184.5 cm in length. Both floors feature beautiful oak designs that will complement any Akupanel.
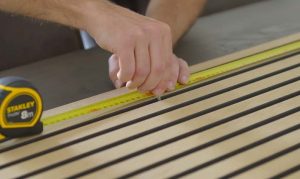
1.1 Customizing the panel
Have you decided between floating or full-coverage installation, chosen the location for the panel, and measured it? If so, it is now time to cut the wooden Akupanel to the appropriate size. You can use a saw machine, jigsaw, or any other type of saw, as long as it cuts to size. Once the panel has been cut to the right size, you can move on to the next step.
1.2 Marking off the wall
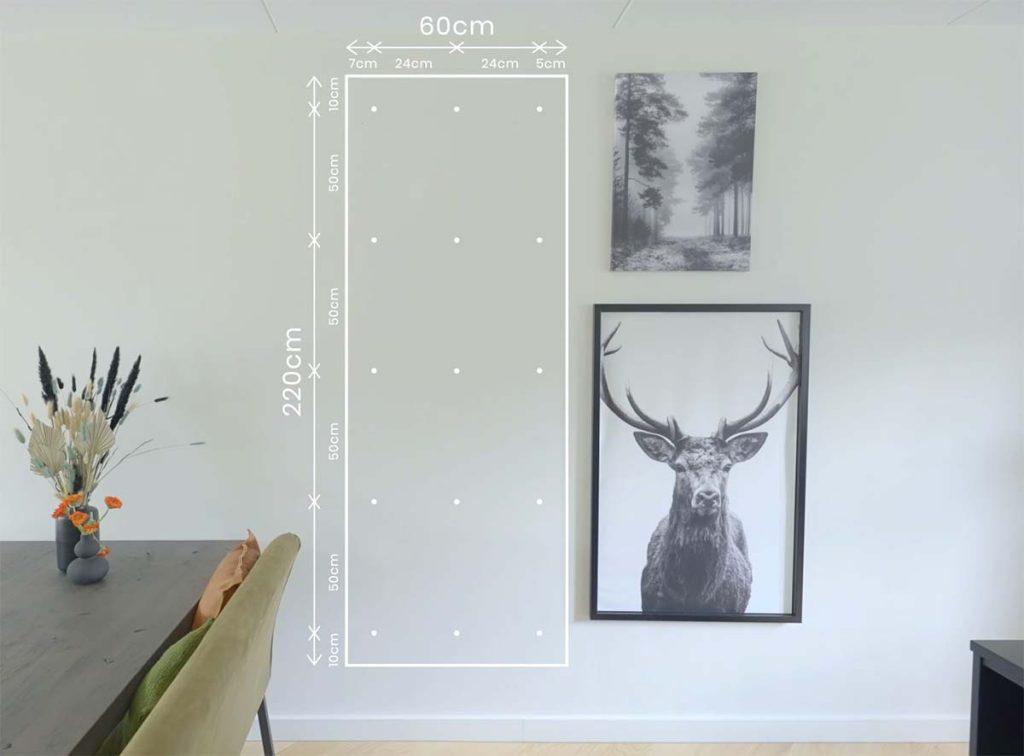
Mark out the wall to determine exactly where the Akupanel will hang. For a wall panel between 220 cm and 260 cm long, we recommend using a total of 15 screws. You can do this in the same way as shown in the picture opposite. The wall panel is 60 cm wide, so you can place three screws on each row. Mark the spots where you want to place a screw. If the wall is 300 cm long, we recommend using 18 to 21 screws. As long as the screws are evenly distributed over the entire panel, you will ensure that the Akupanel is mounted correctly. After marking off the holes, pre-drill them and press the dowels into the holes.
1.3 Pre-turning the screws in the felt
Once you’ve completed this step, you can copy the same dimensions onto the wall panel that you plan to install. Use the screws with a tip to mark the same spots on the felt where the screws will go into the wall. Be precise in your work to avoid creating unnecessary holes in the felt. Next, using a drill, attach the wall panel to the wall.
1.4 Drill it!
Ask someone to help you when drilling the slat wall panel, such as a partner, neighbor, brother, or sister. Because the wall panel is floating, it must be held in place while drilling the middle row of screws into the holes and fixing the panel to the wall. Use a spirit level to ensure that the panel is straight before drilling the remaining screws into the holes. If you are installing a wall panel that covers the entire wall, place the panel straight against the wall where the wooden Akupanel will be installed. Start with the middle row and then screw down the entire panel. Once all pre-threaded screws have been drilled into the wall, the wall will look perfect with a Floer Akupanel Wall Panel!
 2. Securing Akupanel with sealant
 2. Securing Akupanel with sealant
Are you planning to fix the Akupanel using the sealant? Make sure to grab all the necessary supplies. Before installation, it’s important to cut the panel to the correct size. Follow step 1.1 of ‘installing Akupanel with screws’ and ensure that the wall panel is the right size.
2.1 Wall marking and sealant application
If you’re installing two or more panels next to each other, mark the wall with a pencil up to the height of the panels. This will help you determine exactly how far you need to apply the sealant. You can either apply the sealant to the marked wall or directly to the back of the wall panel. Then, press the wall panel into place, making sure to apply firm pressure to all areas to ensure that it bonds well with the wall. Use plenty of Floer High Tack Sealant to ensure that the wall panel sticks to the wall.
It’s done! Once you’ve gone through all the steps, you will have fitted the wall with a Floer Akupanel XL Wall Panel using screws or sealant.
More about Akupanels
Do you want to know more about the 3-meter-long Akupanels?
Which Floer do you combine with a 3-meter-long Akupanel?
It doesn’t really matter which Floer you choose, the Akupanel XL Wall Panels can be combined perfectly with any floor! Thanks to the different wall panels, you can choose a beautiful panel to go with any type of floor. For example, combine the wall panels with a particularly unique Whalebone Vinyl floor. The XL Herringbone Vinyl floors are real eye-catchers in your interior thanks to the extra-long and wide vinyl planks. Do you prefer traditional Herringbone Vinyl? Then choose one of the popular vinyl herringbone floors. Thanks to the register embossing finish, these floors have an extra-realistic oak design!
Prefer a self-laying herringbone floor? Go for the realistic Herringbone Laminate or Herringbone Rigid Click Vinyl flooring collection! This rigid click vinyl collection is also available in straight oak Rigid Click Vinyl planks and tough concrete-look Rigid Click Vinyl. Looking for a concrete-look floor to be laid glued down? Discover the Tile Vinyl, these sturdy vinyl floors are available in various stone looks – from luxurious marble to tough granite, they exist!